


Our stash
Building a Pantry: Getting Ready to Quarantine
Something to think about as you build a pantry is to think about having a dedicated space for some pantry items if someone in your home became sick. This way no one will need to leave the house and you can begin to quarantine. This could include medications and supplies as well as any comfort foods you may want to have on hand. If there are many people where you live who might not be able to discipline themselves from consuming these items it might make sense to put them in a box you can close and set aside. Make sure all members of the house know where this is located.
In my home we have gotten used to working with a modest pantry so we feel like we will be ready if we need to quarantine but we did set aside some items just in case. This is a highly subjective thing since we all crave different things when we aren't well but for us it looks like:
Boxed soup mix
Shelf stable miso (fridge once opened)
Bone broth jar
Egg noodles
Soursop juice
Gatorade
Coconut water
Mucinex
Tylenol
Gloves

Back to the drawing board
Building a Pantry, Step 6: Shopping Again
As you go continue to spread your food shopping trips further apart, keep tabs on how much money you are spending and try to make a budget that works for your house hold. Each time you shop think about the categories approach and build up what you have on hand. An example of this might be with grains. Maybe you start out with a few large bags of rice, so on a subsequent shop when you still have rice at home, you could grab barley or pasta, and create a wider variety of items in your pantry.
If you find that you still have a good amount of staples on hand, it could be a time to grab some extras you missed the first time you shopped, things like extra oil or nicer cooking vingears or different spice blends.

Any extra veggies get roasted together
Building a Pantry, Step 5: Check in
After your first big food shop, you really need to keep tabs on what you use up and what is extra. This will help you get a sense of what you actually need to have on hand without over or under buying. If you have a note by the fridge you can add things as they run out, and update your master list. If you find yourself avoiding certain things or notice items starting to go bad, take them off the list! This seems obvious but for many of us, food has a lot of emotional connections and it can actually be pretty difficult to think clearly about it. I know for a long time, my shopping list was basically a carbon copy of the one my mother used while I was growing up. It took me a few years to realize that I had different preferences and a different lifestyle, so that list was not most effective.
Before you shop again it is important to evaluate everything you have that is opened, close to expiration or otherwise needs to be used and make a plan for it. This seems daunting but does not actually take long and sets you up well for your subsequent food shops. If you do this regularly it becomes second nature. One way to work this in to your schedule is to do it at a time when you would be cooking or making food anyway. If you are making a dish or a meal, you can also deal with the extra odds and end you have on hand.
Some ways to save the random bits you have:
Soup! If you have extra bits of veg or meat and even grains you can knock out a soup you can either eat or add to the freezer
Cut up fruit to freeze
Roast off veggies to eat warm or cold through the week
Building a Pantry, Step 4: Keep your Food Storage Organized
I think that food storage and organization are two of the biggest obstacles to home cooks. Many of us are limited on space and it can be hard to know where things actually belong. When items get pushed aside and lost, it can be very discouraging especially if you only notice it once the item has gone bad or doesn't make sense anymore. While I cant personally arrange everyone’s refrigerator and pantries (as much as I would love to!) I offer two tips from my time in restaurants and grocery stores:
1. FIFO
First
In
First
Out
When you put your groceries away taking the time to make sure that you are putting new items literally behind older or open items of the same will save you time and money. If you have open boxes of cereal but you just open the cabinet and put new ones in, the older ones will get gross and stale. This is true for almost everything you buy. Before you put it away, check if you already have some, and organize it so you grab the most perishable items first.

It is totally fine for your food storage to get disorganized over time!

Group like items together, with the ones that have a shorter shelf life in front

Make a plan for anything that will go bad soon. We will juice these lemons and carrots to freeze.

Our top shelf is strictly left overs and things that should be cooked or eaten ASAP

This honestly took 10 minutes
2. A dedicated spot for items that should be eaten first, and open communication about it
For me, this is literally the top shelf in our fridge and that is where we put leftover, and anything else that will soon spoil. When someone opens the fridge they know to look there before they open something new for a snack or meal. I also post a note on the fridge when I cook something or make something I want others to eat.

I have so many of these!
Building a Pantry, Step 3: Food Shopping for 2 weeks
Now that you have your list, you are just about ready to go! Some things to think about before you head out to the store:
Budget make sure you have a realistic sense of how much money you actually have to spend at the store. It may make sense to take your total, than literally make a mini budget for each area of the store (for example if you have $100 maybe you decide to spend 25 on meat, 25 on produce and 50 on general groceries). Keeping close tabs on how much you spend every single time you shop will give you a better idea of how to work within your budget. For years I would literally use a calculator with my available amount punched in and then subtract the amount of every item i put in my cart. Now that I stick closely to a list that I have shopped repeatedly it is a little easier for me to keep track with some mental math.
Money savers things like sales and coupons take the extra moment when you are choosing your item to evaluate what the most economical option is
Communication within your household Before you go to the store it is important to have very transparent conversations with the people you live in your home about food supplies. This way you can limit how many people actually go to the store and avoid having multiples of the same items if more than one person typically shops. It might also be necessary to create some sort of understanding around what you are trying to build up as pantry staples and what needs to be eaten more quickly (like produce items or leftovers)

Know how to compare prices across package sizes! The orange box in the upper left corner shows a volume price- use that to compare prices across brands. You may be surprised to find that sale prices might not actually have the best value in a category or some generic brands that cost the same as brand names but are sold in smaller containers!

Beans are a versatile way to use any extra vegetables
Building a Pantry, Step 2: Shop What you have on hand
Before you leave your home to go shopping it makes sense to take some time to clean out your fridge and tidy up your food storage areas. As you do this, think critically about your list and literally cross off the things you already have. This is especially crucial if you live somewhere that multiple people buy shared food. Its also a good time to see if you have things that you have partially used that would be good to prepare soon and add anything to your list that might be needed in that instance. An example would be if you came across some random pieces of cheese and opened spinach and decided you wanted to make a frittata for the upcoming week- add eggs to the list!

Before I make my shopping list I make a plan for any extra things I have on hand. These veggies and some dried beans became my lunch for several days

Building a Pantry, Step 1: Make a Master List
If you can, set aside some time to brainstorm your master shopping list. This is a time to be honest about what kind of home cook you are or are not. If you like to eat small snacks throughout the day and hate to use your oven, that is totally valid, and you will be more successful if you shop for that! It is not a time to start a highly specialized diet or to make overly aspirational menus because it is important that right now all of the food we bring into our homes will actually be eaten. Think about your standbys and habits and what you will actually want to make each day.
If there are a few specific meals or recipes you want to make, try to build out your list from there. Think about versatile ingredients and the flavors you love, and adding on pantry (and fridge, and freezer) staples to that.
Try organizing your list by types of food so you can be flexible if there are specific shortages at the store and so that you can build up your reserves each time you go. If you think in generic categories, and buy what is most affordable in that category each time you go you can build up your supplies in a strategic way.
I will post lists you can use if it makes sense for you to work from that. This post is a longer, for people who like to brainstorm from a prompt. We will think through each section of a store imagine a Master List. Think of this like the best case scenario, your perfectly stocked pantry. Once you have that list, you can go through the supplies you already have on hand, and make your actual shopping list for your trip. If you are just starting to build up a pantry, you may decide to add a bit extra each time you shop as your budget allows.
I keep a version of the master list in my journal and each time we food shop, I quickly double check what we have and basically get everything else on the list. It would be just as useful to keep this as note on your phone, or a file you can print out when you need.

Keep it simple
The most important part of this process is being aware of what you already have, and building a habit around checking in with what you use during a given week and making adjustments to your list as you move forward. It can be really easy to assume you will use up a certain amount of something and keep buying it and then one day realize that it’s all still hanging out in a dark corner of a cabinet!
Here we go!
I’ll outline some staples, and give examples of whats on my list but of course your household may have different needs and preferences. Your store may also have additional or different departments, like a bakery and a specialty cheese department. You might want to grab flowers or a houseplant. Since I’m brainstorming about hardy pantry staples, I’m sticking to these basics, but your trip may look slightly different. Take that in to consideration!
PRODUCE DEPARTMENT
Be really selective in produce because many fruits and vegetables are highly perishable and will contribute to your loss if you have too many on hand. Depending on your freezer space it might make sense to get some of your fruits and veggies there
Versatile aromatics
Onions- this is an example of something you can build up over time, maybe buying a bag of a different type each time
Sweet/vidalia
Yellow
White
Red
Shallots
Garlic
Hot peppers
Sturdy fruits and vegetables that don't need to be in the fridge
Potatoes
Sweet potatoes
Hard Squash like butternut
Citrus like lemons, oranges and grapefruit (wipe them down and watch for mold)
Apples
Pears
Vegetables that keep well in the fridge
Carrots
Hearty greens like kale (limit bagged salads or tender greens like baby spinach that mold quickly)
Peppers
Tender fruits and veggies to limit
Salad mixes
Tender lettuces
Spinach
DAIRY DEPARTMENT
Think about fridge space and shelf life in this department!
Eggs- space is the issue these keep well
Yogurt tends to have a long shelf life, larger containers may be more space efficient than cups
Butter (can be frozen)
Cheese Aged cheeses like aged cheddars will keep for a long time and cheese sold in blocks will keep better than shreds
Tofu
Miso
GROCERY DEPARTMENT
Here is where shopping by type comes in to play. Try not to think to specifically in this part of your list so you can adapt based on what is available and what is affordable. Think like this: Egg noddles could replace spaghetti if it is sold out. Choose things like grains, beans and spices based on what is available or has the best price per unit. Oats take up less space on a pantry shelf than boxed cereal…
Grains
you can buy bigger bags of ones you like and rotate what you buy each time, building up a more versatile supply over time
Rice
Farro
Barley
Oats/ oatmeal
Grits/polenta
Nuts- if you like a variety buy what is on sale or cheapest per pound and build up over time
Beans, lentils & legumes canned or dried
Chickpeas
White beans
Black beans
Packaged bean meals (like ready made dal)
Oils
Build up, depending what makes sense for your budget. This is also a category where you can make a self assessment of what you actually need. In our home we cook with a variety of fats and oils and love to experiment or use specific recipes, but we could also go for months with the large can of Olive Oil. Think about what you use the most and try to work your cooking around that.
Vegetable blend
Olive oil
Coconut oil
Ghee
Vinegars
Another category where it makes sense to choose a staple, then add over time if budget allows.
White (remember to get extra if you use this as a cleaner)
Apple Cider (our go-to)
Balsamic
Baking supplies
Think about what you will actually use!
Flour
Baking soda
Sugar
Boxed mixes
Stocks and soup
Canned or boxed, even if you make your own this could help if someone falls ill
Ramen noodles/ packaged soup meals
Canned coconut milk (often in this area)
Condiments
These may seem like extras but if you know a few you like, they will go a long way to make your pantry staples more exciting
Soy sauce
Hot sauce
Ketchup
Mustard
Pasta (and things in that aisle)
Pasta/ pasta meals (like mac & cheese)
Pasta sauce- canned crushed tomatoes is a good alternative if these are sold out
Canned and jarred things
Artichokes
Olives
Other grocery staples
Dried fruit
Nut & seed butters Another category when you can pick a favorite or buy what is on sale. We always have peanut butter but i also find tahini very versatile
Jelly/jam
Tinned fish
Cereal
Granola bars
Bread
Snacks! think about things that won’t take up too much space like pop corn to pop on your own
Coffee even if you use beans, some instant could come in handy
Bottled or Canned beverages
Soda
Juice
Sports drinks like Gatorade
Seltzer
Spices- the best way to build up spices is to know what you like and add as they go on sale. If you do not usually cook a lot at home some blends might give you more bang for your buck.
MEAT
this is a category that has been selling out quickly in many stores so try to be adaptable and think about what would freeze well if you want to build a stash
Chicken breasts
“Stew meat”, chuck, meats that freeze well and are versatile
Sausage can be frozen
Bacon freezes well
Remember some meat may be sold frozen in a different area of the store
Meat balls
Sausage
Chicken tenders
FROZEN
Frozen fruits and veggies are great!
Butternut squash
Peas
Spinach
Medley
Frozen meats
Frozen meals are great but be aware of how much space they take up in the fridge
Bread sold frozen is great, you can take it out as you need it by the slice
PAPER GOODS AND MEDICINE
Toilet paper
Paper towels
Tissues
Hand soap
Dish soap
Disinfectant spray
Medical supplies incase someone gets sick
Decongestant
Did I miss any favorites or things you know you like to have on hand? Add them!
Building a Pantry
This series of posts is for anyone who may be starting to build up the amount of food that they keep in their homes. Due to social distancing, it makes sense to do fewer, larger food shopping trips. It is also a good time to set aside food in case someone in your home gets sick and you need to stay inside for a period of time. If you are able to put a little bit of planning in to this process, it will make it easier to reduce the amount of food you might otherwise end up wasting and stay on a budget as well. My background is as a purchaser and Team Leader at a grocery store so I am offering advice that is about keeping your food shopping and storage streamlined and organized. I have some generic templates you can use to tailor your shopping list towards your own shopping styles and needs.

Yes, I collect shopping lists!
It’s also a really important time for all of us to make an assessment of what our own needs truly are and to determine if there are ways we can strategically share our resources. Learning how to build up a pantry and to cook meals at home can be stressful and challenging. For people without reliable access to food or housing it is literally impossible. When we make our budgets and plans for getting food right now if we have any kind of financial cushion, we can be adding donations to food banks or local mutual aid networks. We can also be reaching out to folks who are vulnerable or who work in essential services and see if they need us to go food shopping for them or if we could make and drop off a meal for them.
I will break up building a pantry into a series of steps that you can repeat continually. Each step will be broken out into its own post so as to not be overwhelming. They are as follows:
Make a master list, with everything you ultimately want to have
Shop what you already have on hand (to make sure you’re not buying things you have)
First food shop
Keep your food storage organized
Check in with what you’ve actually used, reevaluate your list
Subsequent shopping
Preparing for quarantine

Let’s do this!

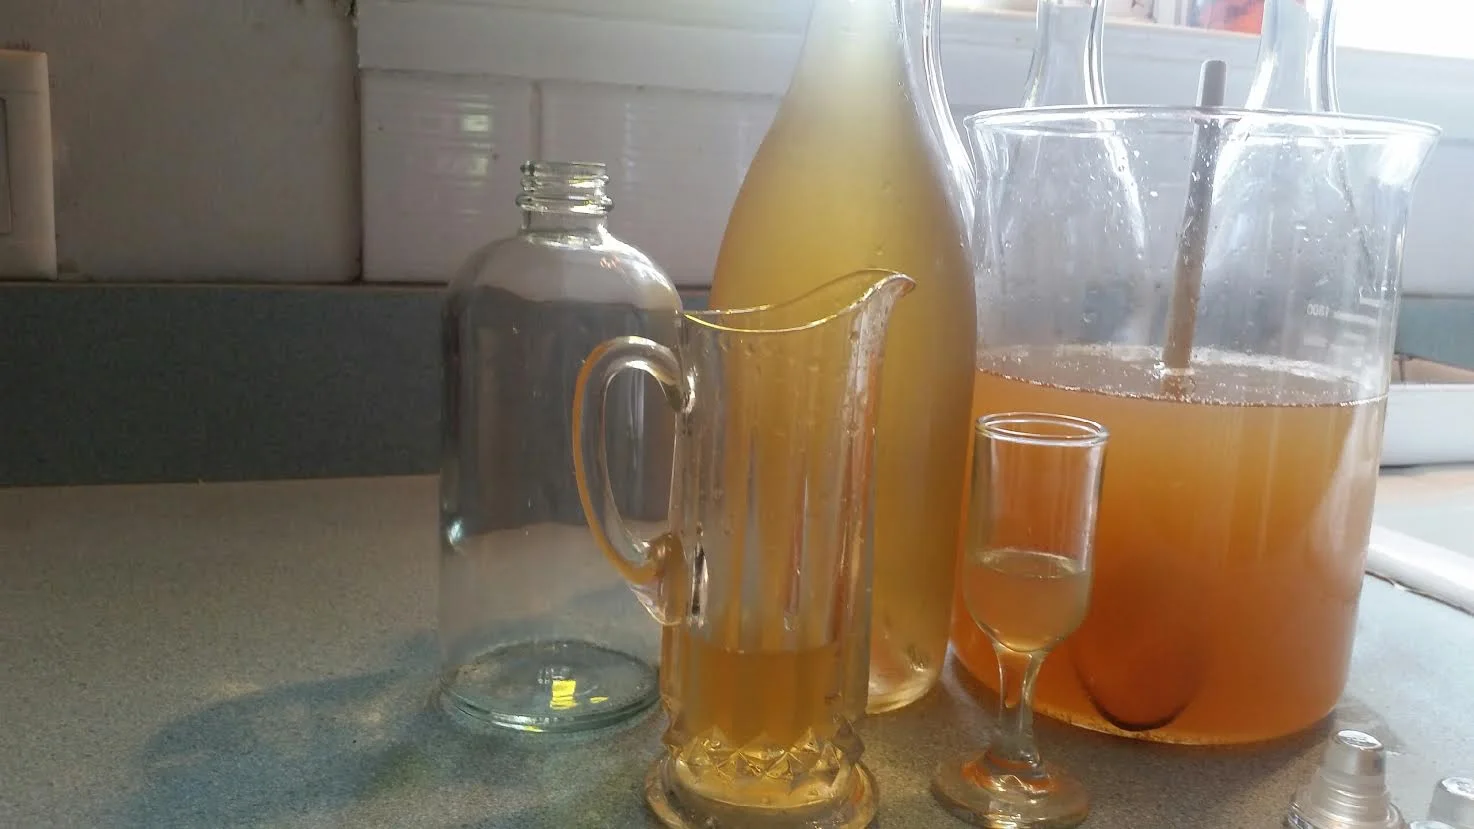
Pear Cordial, Pear Vodka and Krupnik
Speaking of infusions, without further ado: Pear Cordial, Pear Vodka and Krupnik
Each fall, a tree in my parent's yard drops an unholy amount of ugly, too-firm pears onto their lawn. The squirrels attempt to bring them to their nests, but find them to heavy and drop them, chewed up and mushy all over the lawn. This year, I found a use for these less than perfect pears and I sincerely encourage you to buy, forage or pilfer whatever pears you might have and make this cordial. I brought some to the park on the night of the lunar eclipse and my friends passed it around, deeply inhaling. It smells exactly like fall.

When making this cordial you can also make a simple Pear Vodka, and Krupnik, a traditional honey-spiced liqueur popular in Poland and Lithuania.
Making infusions, cordials and liqueurs are more like a method than an exact recipe, and the more comfortable you get, the more you can experiment.
To make Pear Cordial, Pear Vodka and Krupnik:
Chop up pears and place in a clean vessel and submerge in Vodka. There really is no right or wrong pear to vodka ratio because different pears might have different depth of flavor. A good place to begin would be 3 pounds of pears per quart of vodka. I recommend a green skinned pear so the infusion does not get too murky. Some recipes use grain alcohol or 100 proof vodka, but 80 proof Smirnoff is what I keep in my bar any way, so I use that. Keep this covered in the fridge for 2 weeks or until it tastes like pear vodka, the liquid may look brown. Strain the pears and reserve whatever amount you would like to keep as Pear Vodka and decant it into a clean bottle for storage, and keep in the refrigerator. You are done with your Pear Vodka!

On the day you are making the Pear cordial, you will also be making your Krupnik. Again, exact ratios are difficult, because you might prefer a sweeter or stronger spirit, so make this on a day you don't mind having a few sips of booze!
First, make a honey syrup. In a non reactive pan place 8 oz of honey, 8 oz of water, 3 cardamom pods, a cinnamon stick, 5 cloves and a vanilla pod. Heat this on low for about an hour. The point is to get as much flavor into the honey as possible so you can do this a few days ahead of time and keep the spices and honey together in the fridge until you are ready to make the infusions. Strain the syrup before use. You can use a coffee filter, but I think a little sediment and fleck of vanilla are welcome in the finished product.
Take your cold syrup and begin adding it to the pear vodka that you wanted to turn into pear cordial. I used about 3/4 cup of honey syrup in a quart of pear vodka. You are done with your Pear Cordial!
To make Krupnik, add cold honey syrup to vodka. That's it! Some recipes for Krupnik involve citrus peel and the addition of vodka to hot honey (off the flame, please!!) but I much prefer the hold honey syrup method because I can taste the sweetness of the finished product as I add the honey to the vodka and stop once it is a flavor I like. I'm sure I don't need to provide uses for extra spiced honey syrup...
A note on fruit: if you ever find yourself peeling pears or apples for a pie or tart, throw those peels directly into grain alcohol or high proof vodka and let them steep. They will impart delicious flavor and color and when you have time you can make a cordial.
A note on honey: I always keep a jar of local honey with a vanilla bean, cardamom pods, cloves and cinnamon sticks at the ready. When I need to make the syrup I just heat that 50/50 with water and then cool. I can not recommend this to you enough. I am begging you to do it. Imagine adding that to your tea on a rainy day? Imagine drizzling that on toast?
Uses: Pear Cordial is fantastic on it's own but is especially delicious in a cocktail with sparkling wine. Pear Vodka is excellent in ginger beer or as a martini. Krupnik is wonderful to pass around a fire, as-is and is also delicious in cider or other fall beverages.
Infusions
I was standing in a corner of a very crowded kitchen talking to a second cousin I had never met. The room was filled with familiar strangers, long lost cousins; people who look like people we had seen in old photo albums. Everyone passed around a few mason jars of reddish brown liquid, pouring it into our cups, shot glasses and champagne flutes. In the middle of all this, my godfather, a well-spoken, sometimes even poetic man, lifted his dram, pointed at me across the room and shouted “WIDGETTES BRISKEY!” Everyone cheered to this bizarre toast, threw back their drinks, smiling, laughing, clapping each other on the back, assuming he spoke some foreign language, “Prost! Nostrovia!” But I knew he was toasting me. Explaining for everyone, “This is Bridgette’s Whiskey!” Now, whenever I bring my family a new infusion or cordial, we repeat his cheers, “Widgette’s Briskey!”

My grandmothers monogramed decanters make a beautiful vessel for a finished infusion
Infusions and cordials are not only wonderful host gifts, ensuring future invites, but they are among my favorite ways to preserve seasonal, expensive or otherwise ephemeral ingredients. When a recipe tells you to scrape the gooey insides of a vanilla bean, its waxy pod is still filled with heady vanilla flavor. If you have some spirits on hand, you can actually make an infusion and an extract.
When making an infusion, try to think about your ingredient, and what spirit would complement its flavor. 100 proof vodka is great to have on hand if you think you will be experimenting with infusions or cordials because it is virtually flavor-less. Starting out with mild, clear spirits might help you get a sense of how alcohol pulls out flavor and aroma. All you have to do is place your ingredient in a clean jar with a cover, add the spirit, steep in a dark area, smell and taste test until you think it’s perfect, then strain into a clean serving bottle.
Since I personally tend to be a whiskey drinker, I usually have bourbon on hand and I have had great success with infused whiskeys. In the case of the vanilla bean, if you had rum on hand, use that and impress people with your signature mojito.
To make a vanilla bean infusion and extract
Split vanilla pod in two (or in this case I actually had two beans on hand) and put one in a relatively small container and cover completely with the spirit. This will be the extract and you can use it by the droplet in recipes that call for vanilla extract. As time goes on, you can continually add alcohol as you run out of liquid, and even continue to add vanilla beans as you use them. Kept somewhere relatively dark and cool you can use this extract for at least a year.
The other half (or whole) bean goes directly into the bottle of the spirit you make the extraction with and, again, steeps until you feel it reaches its best flavor. In my experience, I usually steep for a couple of weeks and just leave the bean in the bottle as our house tends to use the remains of the bottle before the flavor gets too strong.
Vanilla is also a wonderful complementary flavor and the beans can be added to many other infusions to soften and warm the flavor profile. A vanilla bean thrown into a lemoncello in the making is delicious. I usually make a cinnamon and clove bourbon in the early fall and pour into nip bottles and give them to friends to pour into cider or drink straight around a fire. A vanilla bean complements the spiciness of this concoction.

#toastissomethingimgoodat
At the Table
It's easy enough to giggle at the foodie hipster, when we hear them wonder aloud if free range grass fed organic milk is a thing. And certainly, there are many critiques of social media: that it is over saturated by people/ avatars a little too impressed with themselves and their lunches, churning out hash tags, without wondering whether or not to hyper fetishize and focus on food in such a way is a very privileged-person problem. When there are so many people that don't eat, are we taking our over abundance for granted?
Obviously, I think not. I honestly feel encouraged by the fact that some people are slowing down, and taking the time to think a little harder about the food they are eating- even if it is just because they need to get a better angle with their smart phone. For most of human history, we spent a lot of time focused on procuring and preparing food, and in many ways the industrial revolution and advent of process packaged food has abstracted us from that a bit. Beyond slowing us down, I for one can say that social media has connected me to many individuals with lots to share. I can credit strangers on Instagram for teaching me how to make bone broth, how to source herbs, that frying eggs in olive oil is delicious...
Two awesome women that I know IRL and on the internet as well are hoping to enter the conversation that is happening out there on social media, and to create a space for people to talk open and honestly about food. Jessi Haggerty RD is a dietician and wellness and fitness expert. Allison Nichols is a Paleo health coach. Both of these women have found that often their conversations with their clients focus on the negative associations of food. So they started a pod cast to talk about some of the more exciting and empowering aspects of making, sharing and eating food: At the Table Podcast with Allison and Jessi!
This week we met up and the ladies asked me their list of engaging questions, give it a listen and let us know what you think!!

Trash Heap
I keep a baggie in my freezer for all of my vegetable scraps; onion skins, parsley stems, dried out garlic, awkward ends-of-kale, yes, carrot tops. I keep a separate baggie of anything mushroom related, mostly stems. When I have a day off, and a full baggie, I put the refuse in a stock pot, cover it with water, and let it boil away until the water is full flavored, or I am very bored.
My mother once gave me one of those gigantic pasta pots with a colander insert which always seems like overkill for making pasta, but is perfect for making stock. When it's done I hoist the colander, let the veggies drain a while and that's it: perfect vegetable broth. If you don't have this kind of pot you can just pour your stock through a colander and into a separate pot or storage container. Someone more patient than me would strain this through a cheese cloth, but I don't mind the bits of vegetable refuse that make their way back into to liquid. This can be frozen for later use, but remember to leave a good amount of space in your containers as liquids expand in volume as they cool.
This week I made a roast chicken stuffed with Meyer lemons and thyme, and once it was carved, I threw it in a pot of water and let it simmer overnight. I had the next day off from work and slept in, so this was quite a long simmer. When I woke up I added my freezer scraps and the bowl of veggie ends you see above and let it all go another two hours. After straining, I added some cloves and a star anise and let it all reduce a bit. For dinner, I ladeled this stock over the left over torn chicken breast, and topped with bean sprouts and a mess of fresh herbs and a splash of fish sauce, for a very inauthentic (but very true to the leftovers-for-infinity approach to food-making that is central to Vietnamese cuisine) Pho.

A note on scraps: pretty much all of your kitchen scraps can get a second life as the base for stock. You might need to take consideration of strong flavors that might not blend well with others. For example, I save my fennel scraps for a special strong bone broth I make in the winter when I am sick as it adds a strange mentholated taste to the final stock, which is not unwelcome. Mushrooms get their own baggie in my case because I truly love mushrooms and make a very potent mushroom garlic stock that I use to make shitake soup and is amazing in risotto and braised bok choy as well. You can add yours to your veggie stock if you like.

Carrot Tops
First of all, you can stop buying baby carrots in the bag. Go ahead and grab some big beautiful babies with the long green tops attached. You can cut them thumbsize if you like, but I like to keep them full size and roast them whole. Here I added some olive oil and coriander, which has a soft, subtle flavor that complements the earthy sweetness of the carrots. Roast at 400 F for about 20 minutes, or until they're tender. I like to make a quick dressing of fresh orange juice and a dollop of honey to toss on the carrots. And then, DUH, I garish them with a fistful of chopped up carrot tops. They're astringent and herbal, like a woodsy parsley. Like anything green from the earth, they're nutrient dense and good for you.
Extra carrot tops can be thrown in a blender with oil, some nuts and garlic for a pesto that would be nice on pasta, but also delicious stirred into an Indian curry or a soup. A version with cashew nuts would be amazing on curried lentils with coconut milk.